Thursday, May 31, 2018

I have a new website!

You can find it over at www.baroquepurls.com - there's a gallery of patterns, and a special page for all my tutorials to make them nice and easy to find. How to block scalloped edges is my latest tutorial, to help you perfect the edges of your Beeswax Shawl (or any shawl with a rippling edge).


The new site is also the new home of my blog. My old blog here won't be going anywhere, but all new posts will be appearing over on the new blog
I hope to see you there! 💛

Saturday, February 24, 2018

Magic loop: yes, it is!

After my success with two-colour brioche for the It's New To Me KAL back in October, I decided to keep up my upskilling momentum and try another new technique that I've been vaguely meaning to try for years: magic loop!

If you're not familiar with it, magic loop is a method of knitting a small circumference in the round; an alternative to using double-pointed needles (which I'm prone to dropping). My favourite thing about it is that the 'ladders' which can appear between needles are a little easier to control - at least for me! And I also like switching needles twice per round instead of three or four times, which keeps things flowing nicely. Another benefit is that you can use the same interchangeable needle tips when switching between standard knitting in the round and magic loop - reducing the danger of a tension mismatch. I have a jersey with visibly different tension in the sleeves where I switched from metal circular tips to wooden dpns...

Candide designed by Noriko Ho, my first magic loop project

I picked a simple hat for my first attempt, thinking it would be easiest to focus on one tricky thing at a time. I got the hang of it pretty quickly, with the help of this photo tutorial on the Tin Can Knits blog: Magic Loop Technique. If you'd like to see magic loop in action, I've included a video below. :)

For good measure, I followed up with another simple hat, this time in reverse stockinette, and then jumped in the deep end with a pair of stranded mitts.

obsidian designed by ash alberg, knit in Malabrigo Rios

Underwing Mitts designed by Erica Heusser

If you followed the saga on Instagram, you'll know the second mitt went missing for a couple of nail-biting days before it was discovered stowing away in some clean laundry! Talk about relief...

It was this pair of mitts that really hooked me with magic loop. This kind of design, with a clear front and back, just makes sense to knit on two needles rather than dividing it up further.

My current magic loop project is a pair of scrappy socks, using some pretty leftovers from a couple of different projects. Because I was knitting at a tight gauge, I found I needed to upgrade my needles to a pair with smoother joins between the cable and the needle tips. I settled on a pair of HiyaHiya Sharps from my LYS Maker Maker, which, true to their name need to be handled with a bit more care than I'm used to.

Simple Socks designed by Emily Bolduan

The gist of the technique is this: you'll begin with half of your stitches on one needle tip and half on the other, with the cable looped between them. Then arrange your needles so that you have one free-floating needle tip in your right hand, and knit across the stitches on your left-hand needle tip. When you run out of stitches, rearrange the cable and start again.


If you'd like to try magic loop for the first time, my top tip is to do what I did, and knit a hat on circular needles, switching to magic loop for the crown decreases - this way you won't need to get to grips with a new technique while you're trying to cast on.

Saturday, January 27, 2018

New pattern: Anagram

I'm so happy to finally be able to share this pair of projects with you! The Anagram Hat & Wrap are part of the new amirisu Winter 2018 issue, along with seven other patterns celebrating texture in knitting.

Photo by amirisu

The Anagram Hat is a cosy beanie with crisp texture, and its sibling the Anagram Wrap is a large dramatic rectangle with an all-over lace pattern. The stitch patterns combine modern geometric lace with garter stitch for texture and squish factor.

Geometric stitch patterns have become a real signature of mine - I find them very satisfying, both in the designing stage and the knitting. Because of the small repeating elements in their stitch patterns, the Hat & Wrap are very rhythmic and meditative to knit. I rearranged the little 'blocks' of pattern, with diagonal lines travelling across the garter stitch background, just like rearranging the letters in a word - so I think of these two stitch patterns as 'anagrams' of each other.

Photo by amirisu

The Anagram Hat & Wrap are both knit in Brooklyn Tweed Arbor in the delicate wintery shade 'Thaw'. Arbor's beautifully crisp stitch definition really lets their texture shine. You will need 7 skeins for the wrap and 2 for the hat (including a pompom if you wish).

Photo by amirisu

Hat Features:
  • a cosy textured beanie in modern geometric lace
  • can be topped with a pompom if you wish
  • knit in the round from the bottom up
  • techniques include the long tail cast on, and lace knitting including the occasional double increase and decrease
  • suitable for solid or semi-solid-dyed DK-weight yarn
  • one size, easy to alter by changing the number of repeats around
  • pattern includes full written instructions as well as charts.

Wrap Features:
  • a long cosy rectangular wrap in modern geometric lace
  • knit flat from end to end
  • techniques include the long tail cast on, lace knitting, and a stretchy bind off
  • suitable for solid or semi-solid-dyed DK-weight yarn
  • one size, easy to alter by changing the number of repeats across or lengthwise
  • pattern includes full written instructions as well as charts. 

Photo by amirisu

The patterns are available as part of amirisu Winter 2018, Issue 15. You can purchase a print copy from their website or your favourite yarn shop, or a digital copy from amirisu's website or Ravelry.

Tuesday, January 2, 2018

How to graft garter stitch

Grafting aka Kitchener Stitch is used to seamlessly join two sets of 'live' stitches together. It's commonly used at the toe of socks knit from the top down, but it's useful for other types of project too, including cowls! Two of my cowl designs, Folia Loop and my new Aether Cowl, are knit flat and then grafted garter-stitch-style.

Aether Cowl

Grafting garter stitch is a little simpler than the better-known method for stockinette, since in this case the steps for the front needle and back needle are identical.

The Method:

When your project is ready to be grafted, prepare by breaking your yarn, leaving a long tail, then thread it onto a darning needle. Unpick your provisional cast on and place the live stitches onto another knitting needle. Ensure you have the same number of stitches on each needle. Hold the needles parallel, tips pointing to the right, with the wrong sides of the cowl together.

Begin grafting by inserting the darning needle into the 1st front-needle stitch purlwise, then into the 1st back-needle stitch purlwise. Now work garter-style Kitchener stitch:

*Front needle: insert darning needle knitwise into 1st stitch and slip the stitch off, insert darning needle into 2nd stitch purlwise, pull the yarn through, and adjust the tension. Back needle: as for front needle. Repeat from * until all stitches are grafted.

Tip: when adjusting the tension of the graft, I like to hold my left index finger under the grafted stitches so I can check that the graft matches the surrounding fabric.


Finally, break the yarn if necessary and pull it through the final stitch to fasten off. If you blocked your project before grafting and you feel the grafted row could do with blocking too, you can now spot-block it using a spray bottle.


For tips on casting on for a cowl which will later be grafted, see my previous tutorial: How to work a Provisional Cast On.

Monday, December 11, 2017

How to work a Provisional Cast On

A provisional cast on is a method of beginning a project using waste yarn that will be unpicked later, leaving 'live' stitches which can be loaded onto your needles for grafting. A few of my cowl patterns call for a provisional cast on: Cinnamon Stars, which is knit in the round as a long tube and then grafted, and Folia Loop and my latest Aether Cowl, which are both knit flat and then grafted.


I like the perfectly invisible graft that this technique makes possible - for me, it's well worth taking the extra trouble when casting on. My favourite provisional method is the Crochet Provisional Cast On, which involves crocheting around your knitting needle using waste yarn.

The Method:

Begin with a slip knot on the crochet hook. Hold your knitting needle behind the hook, at a right angle.

* Wrap yarn behind the needle and around the hook, then hook it through the loop already on the crochet hook. One stitch has been made on the knitting needle. Move the yarn back behind the needle, and repeat from * until all stitches are cast on.


Chain a few extra stitches and fasten off. Now you can begin working with your 'real' yarn (yay)!


When the time comes to graft both ends of your knitting together, you can easily 'unzip' the waste yarn beginning at the end with the extra crochet chain tail, transferring the live stitches to a knitting needle as you go. If you find you have one stitch too many, you can drop the final half-stitch.

If you'd like to try an alternative method, Marnie MacLean's Plenty of Provisions article in Twist Collective article has a good run-down of the various methods, complete with step-by-step photos.

Blocking Tip:

One advantage of working a cowl flat is that it gives you the option of blocking it flat before grafting. After knitting the final row of my Aether Cowl, I left the cable from my interchangeable circular needles in place, and wet-blocked it as a long rectangle:


The cast-on end, with waste yarn still in place:


After blocking, I unpicked the waste yarn, slipped the live stitches onto my needles, and grafted the ends together using Kitchener Stitch. Have you tried Kitchener Stitch for garter stitch? It actually has fewer steps to remember, since the moves for the front needle and back needle are identical. For tips, check out my follow-up tutorial: How to graft garter stitch.

If your finished graft looks a little wonky, you can 'spot-block' the graft using a spray bottle of water and stretching it out flat to match the rest of the blocked fabric. Hello, invisible graft!

Friday, December 8, 2017

New patterns: Aether Shawl + Aether Cowl

My final new pattern release of the year is a double shot: a laceweight shawl and a fingering-weight cowl, both featuring a geometric lace pattern inspired by sparkling stars. The shawl is a light, ethereal triangle knit from the bottom up, and the cowl is a quicker knit, worked flat and then grafted.


I took the name Aether from classical science, where it was thought to be a fifth element filling the sky above the terrestrial sphere. In later centuries, the aether was hypothesized to be the medium through which light travels. My starlight-inspired lace pattern is made up of mesh triangles on a background of garter stitch, forming a mosaic of starbursts - a more complex take on the lace from my Hextile Wrap design.

The shawl requires one 100g skein of laceweight yarn. I used a beautiful merino/silk blend from Miss Click Clack called Shark Bay Lace, which has a wonderful shimmer thanks to the silk. The interesting greenish-gold semi-solid colourway is called Fracta Aurea Olivae, which I think translates to 'broken golden olive'.

Shawl Features:
  • a delicate triangular shawl featuring geometric lace and garter stitch
  • worked from the bottom up
  • the garter stitch border begins with picked-up stitches around the diagonal edges
  • techniques include garter stitch and simple lace, picking up stitches, and a stretchy bind-off
  • a one-skein project in laceweight yarn
  • suitable for solid or semi-solid-dyed yarn
  • easy to enlarge by adding pattern repeats
  • pattern includes full written instructions as well as charts.


The cowl is also a one-skein knit, but in fingering-weight yarn. I used Skein Yarn's Top Draw Sock, a very soft merino/nylon blend, in a calm greyish lavender called Très Chic.

Cowl Features:
  • a light, drapy cowl featuring geometric lace and garter stitch
  • worked flat beginning with a provisional cast on and grafted to form the loop
  • techniques include garter stitch and simple lace, a provisional cast on, and grafting
  • a one-skein project in fingering-weight yarn
  • suitable for solid or semi-solid-dyed yarn
  • easy to enlarge by adding pattern repeats
  • pattern includes full written instructions as well as charts.


The model for these designs is the amazingly talented Francoise Danoy of Aroha Knits, who I was lucky enough to meet in person during her recent trip to Melbourne!

You can see all the details and purchase the Aether Shawl and Aether Cowl patterns on Ravelry.

Thursday, October 26, 2017

Brioche beginnings

I'm learning to knit brioche, and I'm absolutely loving it! It's just so thick and squishy, and it makes colour combinations really sing...


I've been wanting to learn to knit brioche stitch for a long time. I even have one of Nancy Marchant's books on brioche, but sometimes my design knitting deadlines don't leave much space for playing with new techniques and knitting other designer's patterns. I finally got the push I needed when I heard about Karen of Wool Gathering Australia's It's New To Me KAL. There are a few of us knitting our first two-colour brioche projects for the KAL this month, and sharing tips and encouragement.

If you're not familiar with brioche stitch, here are some examples of designs from my Ravelry favourites which I think really show off its strengths and possibilities:
  • Really bold stripes and zigzags in two or more colours - Stephen West's Askews Me Shawl and Briochevron Wrap (which I plan to make one day as a sock yarn stash-buster)
  • More subtle two-colour brioche, with garter stitch as a contrasting texture - Andrea Mowry's What the Fade!? shawl, Bristol Ivy's Jemison cowl from her forthcoming book Knitting Outside the Box, and Lesley Anne Robinson's Unda shawl (which has a very subtle colour pairing)
  • Classic, cosy texture in a single colour - Jared Flood's Oshima sweater, and Olga Buraya-Kefelian's Gren mitts
  • More complex texture in a single colour - Bristol Ivy's Lisse shawl and Burke cardigan, and Norah Gaughan's modular Counterpane sweater.

The pattern I've chosen to knit for the KAL is Katrin Schubert's beezee hat. I chose a hat because it's a manageable-sized project (I was tempted to try for a large shawl or wrap, but I have other projects to finish!), and I chose this design because I liked the boldness of the stitch pattern. It's my current weekend project, which I've been chipping away at when I'm hanging out on the couch.

I dug through the DK yarn in my stash and chose a speckled main colour, 'Koi' on Walk Collection Cozy Vintage, and a calm grey background colour, 'Eastern Reef Egret' on Circus Tonic Handmade DK:


I'm knitting the biggest size, and I can tell it's going to be a long, slouchy kind of hat. I've just reached the start of the crown decreases, so there's not much more to go.

If you're keen to try knitting some brioche, I recommend just diving in! Here are a couple of resources I used when I got stuck (for example, the first time I had to work a decrease):

Tuesday, September 26, 2017

How to embiggen your shawl

Do you like your shawls and wraps to be as big and cosy as possible? Many patterns are easy to enlarge, if you have extra yarn on hand. And if you'd like to make a smaller shawl, because it would suit you better or you're short of yarn, the principles are exactly the same. I like to include suggestions for customising the size in my patterns wherever possible, so your project will come out Just Right.

Budburst shawl by Amy van de Laar

The designs which are simplest to re-size have an all-over stitch pattern, and I'll be focusing on these since several of my shawl and wrap patterns are in this category. It gets a little more complicated if the edging contrasts with the main stitch pattern (e.g. my Silverwing shawl) - here you would need to consider how the proportions of the two sections will look if you enlarge one or both of them.

Let's take a look at a couple of common shapes and how to approach re-sizing them.

Triangles

Triangular shawls are usually easy to enlarge, because the cast on number does not affect the shawl's final size - you can simply knit extra repeats if you decide at any point that you'd like it to be larger.

If you have a precise final wingspan size you're aiming for (if for example you find a 65" wingspan easy to wear), and the shawl has the same stitch pattern throughout, you can calculate how many repeats to knit by measuring the size of one repeat on the diagonal. I'll be using my Budburst shawl as an example, which is a triangular shawl knit sideways from tip to bind-off edge, with an all-over lace pattern. This formula will also work for traditional top-down triangles (like Amarilli), and other triangles where the wingspan is diagonal to the direction of knitting.

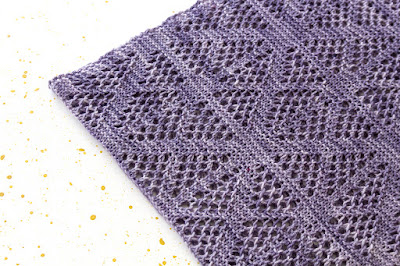
Measuring a diagonal pattern repeat on a swatch

One you know both the target wingspan and the size of one diagonal repeat, you can use this formula to find the total number of repeats to knit:

Desired wingspan size / diagonal size of one repeat = number of repeats.

If the answer is a fraction, round it up or down to a whole number.


Rectangles

Lengthening a rectangular wrap or scarf knit end-to-end is just as simple, because again you can simply knit extra repeats. Adjusting the width of a rectangle is a little trickier, because in this case the number of stitches you cast on does directly affect the final size. I'm using my Beeswax Scarf as an example here, which has an all-over stitch pattern and includes three width options from scarf to wrap.

If you want to widen a rectangle which is knit from end-to-end, you'll need to know two things before casting on:
  1. The width of one repeat (find this by swatching if you need precision, or take the info from the pattern if it's given), and 
  2. The number of stitches in each repeat (find this from the gauge info in the pattern, or from the chart).
The formula to find the number of repeats across a row is:

Desired finished width / width of one repeat = number of repeats.

If the answer is a fraction, round it up or down to a whole number.


Now you can calculate exactly how many stitches to cast on:

Number of repeats x number of stitches in one repeat = number of stitches to cast on.


Remember to add the edge stitches to this total, if any. They will add a little extra width.

Other shapes, like crescents, pi-shawls, and all the many weird and wonderful shapes knitters keep inventing, will need different approaches depending on their construction. I hope this partial guide has been helpful as an intro, and gives you an idea of which variables to look at when you want to change the size of a shawl.

Monday, September 4, 2017

Pooling on purpose

As promised, here is the tale of how I got the colours to pool so nicely in my smaller Rainbow Cake hat. The pastel rainbow colours of the yarn (Madelinetosh's Pure Merino Worsted in 'Pocket Rainbow') practically demanded that I have a go at controlled colour-pooling, and I couldn't be happier with the way it worked out. :)


The first step, of course, was swatching. I cast on about 40 stitches, knit in seed stitch until I reached the start of a pink section of yarn, and then counted my stitches until I reached the same point in the colour cycle. I repeated this a few times to make sure my count was consistent (to within a stitch or two).

I discovered I was getting 70 stitches per colour repeat, in seed stitch on 4mm needles. The smaller size in my Rainbow Cake pattern-in-progress had a 72-stitch cast on, which I decided was close enough for the pooling to work.


The first time I cast on for the hat, I used smaller needles to get a nice tight, tidy ribbing section. This change of needle size caused the colours to line up in little rainbows instead of pooling, which looked really cool! But unfortunately the stitch pattern was obscured a little too much, and I decided to start over.


The second time, I used the same needle size throughout in order to get consistent 'stacked' colour pooling right from the cast on through to the crown decreases. This time the stitch pattern was clear, and the yarn complemented the design rather than muddying it.

While knitting the hat, I found I often needed to tink/un-knit part of a round to get the colour repeats to line up nicely. My tension definitely changes depending on how fast I'm knitting and how much attention I'm paying to it, and I found myself zooming through the cream sections to get to the next 'rainbow', only to discover I had far too much cream yarn leftover. At least I'm pretty good at tinking these days!

I was happy to see the colours begin to swirl when I started the crown decreases, making a little whirlpool around the pompom. :)


If you'd like to try deliberate colour pooling, my advice is to swatch carefully, stick to one needle size, and be prepared to do a lot of tinking/un-knitting if your tension is a little wonky like mine.

This Twist Collective article by Karla Stuebing goes really in-depth into how pooling works: The Art and Science of Planned Pooling.

And here are a couple of shawl designs that make great use of planned pooling: Pool & Conquer by Martina Behm, and Pool Party by Ursa Major Knits.

You can read all about my Rainbow Cake design in my previous post, and the pattern is available on Ravelry.

Wednesday, August 30, 2017

New pattern: Rainbow Cake

It's been a while since I released a new hat design, but here we go! Rainbow Cake is a cosy textured beanie designed to complement speckled or gently-variegated yarn. I really enjoyed knitting the two samples for this design, they went so fast compared to my usual diet of shawls (much as I adore them).


The arcs of ribbing remind me of rainbows, and the seed stitch texture looks like sprinkles when you combine it with a speckled yarn. I used two special skeins of madelinetosh yarn for these hats: one skein of Pure Merino Worsted in 'Pocket Rainbow' for the small sample, and one of 80/10/10 Worsted in 'Holi Grunge' for the large one. I really love the colour-pooling in the smaller hat, which I managed to achieve after a false start or two - but I'll tell you more about that in another post.

Because you only need one skein of yarn for either size (including the pompom and gauge swatch), a Rainbow Cake hat might be just the thing for one of the single skeins in your stash...


The two sizes are intended to fit kids with a head circumference between 16-19” / 40.5-48.5cm (Small size), and adults with a head circumference between 20-23” / 51-58.5cm (Large size).

Features:
  • texture made up of arcs of ribbing and seed-stitch panels
  • topped with an an optional pompom
  • a quick one-skein project, perfect for gift knitting
  • two sizes, for children and adults
  • requires one skein of worsted-weight yarn
  • suitable for speckled, semi-solid, or variegated yarn
  • pattern includes full written instructions as well as charts.


You can see all the details and download the Rainbow Cake pattern on Ravelry.

- - - - - - -

If you're curious which recipe I used for my delicious photo props, it's the classic vanilla cupcake recipe from the Edmonds Cookbook, with my favourite lemon icing. Serious 80s birthday party nostalgia!

Tuesday, July 18, 2017

A new look!

You may have noticed my blog looks a little different than it used to - and you'd be right! I've been working on refreshing the 'look' of my knitting design business, to match my current taste and design style a bit better. I do hope you like it. :)

I went through quite a lengthy process of collecting images to use as inspiration, and reading up on typography + logo design + branding in general. Yes, it would all have been much faster if I'd hired a pro to sort it out for me, but I was curious to learn about these areas, and I'm a bit of a control freak when it comes to design, especially for an important project like this.

My 'inspiration board'

I wanted a light, bright, beautiful feel, with a handmade, playful side to it. I also really wanted to keep yellow in the mix, since that colour means happiness to me. My 'inspiration board' features swirling shapes, yellows and golds, details from Klimt paintings, music in the form of a violin scroll, and nature in the form of trees, flowers, and bees.

I love any excuse to get out our art supplies, and I had a lot of fun drawing and tweaking my new logo. Because I'm a massive nerd, the starting point for my hand-lettering style was an 18th-century title page for a book of keyboard music by J.S. Bach:


Here's the the finished lettering for my logo, together with a circle of purl stitches in light, warm yellows:


Did you know the Baroque period in music (when my faves Bach and Handel and Monteverdi were composing) gets its name from 'baroque' shaped pearls? This type of pearl is irregular and bumpy, and the analogy to music was  originally meant as an insult, much like 'Impressionism' in painting. My yellow circle of purls is my attempt at a pun - it's a baroque pearl made of purls.

I also sketched a loose, flowy texture based on the structure of plain stockinette or garter stitch, which I'll use as a background or wherever it's needed. I made a little stop-motion video of myself inking over the pencil sketch, just for fun...


(Click to play gif!)

I'm hoping these elements, along with my new colour palette and selection of fonts, will be versatile enough for all of my blog, social media, newsletter, and pattern layout needs. I'll be updating all of these over the next while! And most exciting of all, I'm going to be working on a new website to house a pattern gallery, with tutorials and everything else all in one place.

---------------------------------------------------

In case you're curious, this book is one of the main resources I used for this whole process. It's been fun, but I admit I'm impatient to get back to focusing on designing!

Thursday, June 8, 2017

New pattern: Leadlight

It's always exciting when I can finally share one of my secret projects! Today Leadlight gets its big reveal, as part of Brooklyn Tweed's Wool People 11. This is my third Wool People outing, and the third of my designs in Brooklyn Tweed's wonderful yarn (the first two being my Amarilli and Kea shawls).

Be sure to browse through the WP11 lookbook, which is completely gorgeous! I like to save them up until I have a little uninterrupted time to soak up the inspiration. :)

Leadlight, photo by Jared Flood

Leadlight is a rectangular stole in laceweight yarn, featuring large-scale geometric lace. I was inspired by the image of sunlight streaming through glass panes, and the memory of a small geometric stained-glass window I had in my room which my Dad had made (picture framers are good with glass, after all).

(Photos by me, before I sent Leadlight off to the USA.)

The lace is simple to knit, while the construction and finishing methods keep things interesting: beginning with a circular cast on, the centre of the stole is knit in the round as a square. After placing some of the stitches on hold, the two ends of the stole are each knit flat to create a rectangular shape. Finally, a garter stitch border finishes off the edges.

The centre of the stole, worked outwards from the pinhole cast on

The garter stitch border keeping things crisp

Vale is a new laceweight yarn from Brooklyn Tweed, a springy, plied yarn that's light and soft, but substantial and full of personality. It blocks easily and drapes beautifully, which makes it just perfect for lace knitting.

I knit my Leadlight stole in the colour Heron, which is a calm, neutral, mid-toned grey with a subtle sheen to it. The whole Vale colour palette is beautifully subtle - I definitely plan to use this yarn for more lace projects!

A close-up of the centre

Features:
  • an all-over geometric lace pattern
  • constructed from the centre out, with two sides extended to form the rectangle
  • a circular cast on (instructions for the Pinhole Cast On are included)
  • a garter stitch border all around the edge
  • a stretchy bind off (instructions for the K2tog-tbl Bind Off are included)
  • easy to alter the length by working a different number of repeats
  • requires 3 skeins of Brooklyn Tweed Vale, or 1170yds of laceweight yarn
  • the lace instructions are presented as charts only.

Drapery studies...


You can purchase the pattern for Leadlight on Ravelry, or from Brooklyn Tweed's website. Their Summer of Lace KAL is coming up very soon, beginning later this month.