Showing posts with label learning new tricks. Show all posts

Saturday, February 24, 2018

Magic loop: yes, it is!

After my success with two-colour brioche for the It's New To Me KAL back in October, I decided to keep up my upskilling momentum and try another new technique that I've been vaguely meaning to try for years: magic loop!

If you're not familiar with it, magic loop is a method of knitting a small circumference in the round; an alternative to using double-pointed needles (which I'm prone to dropping). My favourite thing about it is that the 'ladders' which can appear between needles are a little easier to control - at least for me! And I also like switching needles twice per round instead of three or four times, which keeps things flowing nicely. Another benefit is that you can use the same interchangeable needle tips when switching between standard knitting in the round and magic loop - reducing the danger of a tension mismatch. I have a jersey with visibly different tension in the sleeves where I switched from metal circular tips to wooden dpns...

Candide designed by Noriko Ho, my first magic loop project

I picked a simple hat for my first attempt, thinking it would be easiest to focus on one tricky thing at a time. I got the hang of it pretty quickly, with the help of this photo tutorial on the Tin Can Knits blog: Magic Loop Technique. If you'd like to see magic loop in action, I've included a video below. :)

For good measure, I followed up with another simple hat, this time in reverse stockinette, and then jumped in the deep end with a pair of stranded mitts.

obsidian designed by ash alberg, knit in Malabrigo Rios

Underwing Mitts designed by Erica Heusser

If you followed the saga on Instagram, you'll know the second mitt went missing for a couple of nail-biting days before it was discovered stowing away in some clean laundry! Talk about relief...

It was this pair of mitts that really hooked me with magic loop. This kind of design, with a clear front and back, just makes sense to knit on two needles rather than dividing it up further.

My current magic loop project is a pair of scrappy socks, using some pretty leftovers from a couple of different projects. Because I was knitting at a tight gauge, I found I needed to upgrade my needles to a pair with smoother joins between the cable and the needle tips. I settled on a pair of HiyaHiya Sharps from my LYS Maker Maker, which, true to their name need to be handled with a bit more care than I'm used to.

Simple Socks designed by Emily Bolduan

The gist of the technique is this: you'll begin with half of your stitches on one needle tip and half on the other, with the cable looped between them. Then arrange your needles so that you have one free-floating needle tip in your right hand, and knit across the stitches on your left-hand needle tip. When you run out of stitches, rearrange the cable and start again.


If you'd like to try magic loop for the first time, my top tip is to do what I did, and knit a hat on circular needles, switching to magic loop for the crown decreases - this way you won't need to get to grips with a new technique while you're trying to cast on.

Thursday, October 26, 2017

Brioche beginnings

I'm learning to knit brioche, and I'm absolutely loving it! It's just so thick and squishy, and it makes colour combinations really sing...


I've been wanting to learn to knit brioche stitch for a long time. I even have one of Nancy Marchant's books on brioche, but sometimes my design knitting deadlines don't leave much space for playing with new techniques and knitting other designer's patterns. I finally got the push I needed when I heard about Karen of Wool Gathering Australia's It's New To Me KAL. There are a few of us knitting our first two-colour brioche projects for the KAL this month, and sharing tips and encouragement.

If you're not familiar with brioche stitch, here are some examples of designs from my Ravelry favourites which I think really show off its strengths and possibilities:
  • Really bold stripes and zigzags in two or more colours - Stephen West's Askews Me Shawl and Briochevron Wrap (which I plan to make one day as a sock yarn stash-buster)
  • More subtle two-colour brioche, with garter stitch as a contrasting texture - Andrea Mowry's What the Fade!? shawl, Bristol Ivy's Jemison cowl from her forthcoming book Knitting Outside the Box, and Lesley Anne Robinson's Unda shawl (which has a very subtle colour pairing)
  • Classic, cosy texture in a single colour - Jared Flood's Oshima sweater, and Olga Buraya-Kefelian's Gren mitts
  • More complex texture in a single colour - Bristol Ivy's Lisse shawl and Burke cardigan, and Norah Gaughan's modular Counterpane sweater.

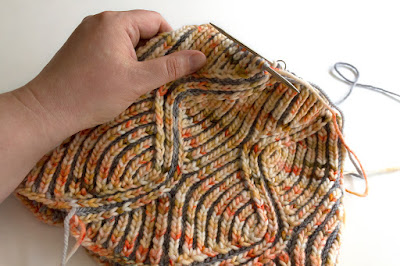
The pattern I've chosen to knit for the KAL is Katrin Schubert's beezee hat. I chose a hat because it's a manageable-sized project (I was tempted to try for a large shawl or wrap, but I have other projects to finish!), and I chose this design because I liked the boldness of the stitch pattern. It's my current weekend project, which I've been chipping away at when I'm hanging out on the couch.

I dug through the DK yarn in my stash and chose a speckled main colour, 'Koi' on Walk Collection Cozy Vintage, and a calm grey background colour, 'Eastern Reef Egret' on Circus Tonic Handmade DK:


I'm knitting the biggest size, and I can tell it's going to be a long, slouchy kind of hat. I've just reached the start of the crown decreases, so there's not much more to go.

If you're keen to try knitting some brioche, I recommend just diving in! Here are a couple of resources I used when I got stuck (for example, the first time I had to work a decrease):

Thursday, January 19, 2017

Swatching in the round

Swatching in the round is something I know I should do if my project will be knit in the round, but I admit I sometimes swatch flat instead, especially if the stitch pattern is easy to work flat (like stockinette or a knit/purl texture). But for an important project like a garment or something else that will take a lot of yarn and time, there's no way around it - swatching in the round will give you the most accurate gauge information.

In this post I'll be showing you how I knit the swatch for my Cinnamon Stars cowl. The method will work for any stranded colourwork project, and for any other project knit in the round.


I planned ahead by adding a few extra stitches either side of the colourwork chart, alternating stitches of each colour in a chequerboard pattern - I got the idea from the 'bridge' stitches of a traditional no-sew steek. These extra edge stitches helped to keep the inevitable wonky edge stitches separate from the main part of the swatch. 

Because I had plenty of yarn in each colour, I decided to make a swatch that would be cut after knitting. Here's what I did:

1. Using a shortish circular needle, I cast on and knit a couple of rows back and forth in garter stitch.

2. I joined my second colour and began knitting the swatch 'in the round': at the end of each row, I slid my swatch back to the other end of the circular needle, draping strands of the working yarn loosely across the wrong side of the swatch.


3. When I had finished the colourwork, I knit a couple of rows of garter stitch with a single colour and then bound off.

4. I carefully cut the loose strands at the back of my swatch, avoiding cutting through any of the colourwork floats beneath.


5. I tied neighbouring strands together to make a more secure fringed edge on either side. This step is optional, especially if you don't wish to keep your swatch!


5. Finally, I wet-blocked the swatch to make it lie flat and even up the stitches. Once it was dry, I took my stitch and row gauge measurements and my colourwork-repeat measurements.


If you don't have extra yarn to spare, you could knit a 'froggable' swatch by making the loose strands across the back long enough to allow you to block the swatch without cutting them. Alternatively, there are other methods for swatching in the round that use even less yarn - the second method in this TECHknitting post 'Circular swatches knit flat' looks very efficient, but I admit I haven't tried it out yet. You'll recognise the first method as the one I used above.

Do you have a favourite swatching method?

Wednesday, January 20, 2016

Craft holiday II

My post-Christmas break in NZ is nearly over, so it must be time to show off all the things I made! Like my previous craft holiday, I took full advantage of having access to Mum's sewing machine. This time I made tops using downloadable indie patterns. I haven't had much experience sewing from patterns (as opposed to following photo tutorials on blogs or just figuring things out myself) - so I learned a lot along the way. :)


I started off making a Wiksten top out of some lightweight cotton fabric with a diagonal tie-dye stripe. I enlarged the pattern one extra size, which worked well - hooray for drawing skills! The fit is pretty good, certainly good enough for a casual top.

I dove into making a second one, this time using a crystal-print cotton sateen fabric from Spoonflower and plain white bias binding. Mum thought the fabric was far too heavy for a Wiksten top, and (surprise, surprise) she was totally right - it didn't drape well, so the not-quite-right fit around the armholes was very obvious. She fixed the problem by demonstrating how to put in some small darts above the bust line - thanks Mum!

I moved on to another pattern for my next sewing adventure, a Fen top in a black linen-cotton blend. Instead of following the pattern's instructions I kind of did my own thing while sewing it up. This worked out very well with the bias binding around the neckline (which is super tidy if I do say so myself):


However, I messed up with the seams - I decided to do French seams again, but didn't realise it would cause problems with the curved underarm seams. Luckily the fabric looks the same on both sides, so I just decided to turn the top inside-out and continue. It's not a mistake, I declare, it's a design decision to have my French seams on the outside. ;)

Again, my fabric was a bit too heavy for the pattern, but I think it looks ok this time. It's certainly a very comfortable, roomy top. I'll be looking out for lighter, drapier fabrics to make more Fen tops the next time I do some sewing.


Learnings:
  • using proper patterns isn't hard or scary
  • I can enlarge a pattern if necessary by looking at the outlines of the other sizes and just drawing one size further 
  • bias binding isn't hard to get nice and tidy (if you use the iron a lot)
  • fabric choice is IMPORTANT - pay attention to the pattern's fabric suggestions, and Mum's warnings
  • French seams are awesome, but not for curved underarm seams
  • linen / linen blends are easy to work with
  • bust darts are my friends 

--------------------------------------------------------------------------------------------

I've also been knitting away on a new scarf design which I plan to release in the next week or two, once it's all photographed and polished up. Here's a peek at the scarf-in-progress...

Thursday, November 5, 2015

Dyeing with eucalyptus II

We had a wonderful time in Napier! The food was amazing, the weather was pleasant, and the hotel was great. And so was the main event! Congrats Jeff and Colleen, it was a lovely wedding. I'm so glad Willie and I were able to be there. <3

The day after the wedding, hordes of friends and family descended on the Grays' place for lunch. The best part for me was watching their (very bouncy) dog play with their three goats. We've been hassling Jeff to take a video to put online, because it's ridiculously entertaining...

Between the goat paddock and the beehives were some eucalyptus trees with blue-green leaves. I've been on the lookout for some accessible blue-green eucalypts to dye fabric with, ever since I read in India Flint's Eco Colour that these are the ones which give orange or red dye. I asked nicely, and picked a few good-sized twigs to experiment with back in Whakatane.


On Tuesday I had a go at Flint's 'eco-print' technique, scattering pieces of eucalyptus twigs between the folds of a plain silk scarf, rolling it around a stick, and tying the bundle tightly with string.


I tossed the bundle and some leftover leaves and twigs into a pot with enough water to cover it all, and boiled it all for 45 minutes. Then the hard part began - waiting until the next day to unroll the bundle and see what colours I had!

And... it worked! The scarf has areas of apricot-orange where the leaves were pressed tightly against the fabric, and paler areas in between. I didn't achieve strongly defined leaf prints, but I'm happy with my first attempt. I imagine tighter rolling and tying of the bundle would produce clearer prints.


If you click and enlarge this last photo, you can see stripes in the upper left corner from the string around the bundle. Pretty cool! It's amazing what just leaves + fabric + water + heat can do.

Wednesday, September 9, 2015

Knitty & Me

Back in the mists of time - *cough* - ok, in 2009, I was a fairly new knitter with a few scarves under my belt. One was a giant garter-stitch scarf in Gryffindor colours, one featured mint and neon green stripes and ruffled ends (that started off as a mistake), and one was actually quite nice - a linen scarf in basket stitch which I gave to Willie.

And then I discovered two things that completely changed my crafting life: Ravelry and Knitty.

And I started knitting things like this anatomically-inspired heart, which I think was my first experience with knitting in the round. I used double-pointed needles and yarn held double, which wasn't easy...

Anniversary heart, 2009 (pattern: Kristen Legett's Heart)

And then I made these three-fingered gloves, which I remember struggling with. Double-pointed needles AND a cable needle added up to a handful of unruly spikes. But I got there, and the gloves were cool!

Reptile gloves, 2009 (pattern: Tina Melvin's Tridactyl)

The fun patterns that were coming out began to spark ideas, like the alternative moustache shape I used on this cowl. I shared my moustache chart on my Ravelry project page, and it was a thrill to see a few people use it on their own cowls.

Cowl of Disguise, 2010 (pattern: Mercedes Tarasovich-Clark's Incognito)

I had a go at whichever patterns inspired me, and built up a lot of new skills as I went. This hat (covered in fossil trilobites!) was my introduction to more complex texture with cables and bobbles. I'm keen to knit a new one actually, I love this design.

Fossil hat, 2010 (pattern: Hannah Ingalls' Trilobite)

Eventually I took the plunge and knit an actual garment for myself. And I didn't choose a simple one - I went for it and chose one that looked AMAZING. It's knit in separate pieces, with complex cables on the front and back, and double-moss-stitch texture on the sleeves and sides. It took me about three months to knit, and I was super-proud when it fit!

A progress photo, courtesy of Dad

My First Jersey, 2011 (pattern is Norah Gaughan's Beatnik)

I've since knit more things from Knitty (like my steeked Iðunn cardie), and I have more things in my queue waiting to be knit (like these cute Geek Socks). I've also learned heaps from the articles, and refer back to them for reminders of particular techniques. And I still can't quite believe I have a pattern of my own in Knitty too. :)

Knitty is going through some changes at the moment, and I'm supporting it through Patreon so it can keep being awesome. I've got a massive amount out of it over the years, especially when I was a relative beginner. Easily accessible free patterns for stuff I actually wanted to make? And articles with tutorials for all the new tricks I wanted to learn? Gold.

Thank you, Knitty. <3

Sunday, November 16, 2014

Turnin' Tricks

A couple of months ago I helped out on a 48 Hour Film, which was totally amazing and exhausting and hilarious. My post about the experience is here: A 48-hour adventure.

We were among the four films nominated for 'Best Musical Score' from this year's batch of Melbourne films (although we didn't win), and our music team actually won a prize from a film-making school!

The film is up on Youtube now, so enjoy! Keep an eye out for me, Willie, Julian, and Chloe (aka 'the band'). Celena is starring (and rapping)...

Monday, November 3, 2014

A bounty of books

A few exciting packages have arrived lately, because I've been buying books!

I ordered a shiny new copy of June Hemmons Hiatt's The Principles of Knitting, which I've been hankering after for ages. It's very in-depth, and will obviously take me quite a while to absorb. I really like having actual reference books around! The internet is a fount of all knowledge, yes, but often I just want to grab a familiar book when I need information on a technique...

Suitably attired!

I also found these second-hand knitting books going cheap on Ebay: Montse Stanley's Knitting Your Own Designs for a Perfect Fit, and Barbara Walker's Charted Knitting Designs. I have plenty to learn about garment construction, and I find stitch patterns endlessly fascinating. I'm still on the lookout for Barbara Walker's other stitch dictionaries.

They're older books, but most of the information is still useful and current.
I want to learn more about knitted garment construction as I think I might like to try designing a sweater sometime. And in the meantime, I'll be better equipped to tweak other people's designs fit me properly. :)


A peek inside...

And last but not least, I ordered my own score of Handel's Messiah. I've joined a new choir (at the Scots' Church in the central city), and we'll be performing it this December. The new choir is going well so far - there are plenty of good singers, and we've done some interesting music. I feel like I'm diving into the 'other half' of the choral repertoire, i.e. the Protestant side of things. Good thing I like Bach. ;)

I think I'm the only choir-geek in the English-speaking world who's never been in a Messiah performance, so this will be interesting! I know two of the choruses already (and the soprano solos of course), so that's a start. I just need this damn cold to go away so I can start learning my parts...

"Hallelujah", etc etc...

Wednesday, September 10, 2014

A 48-hour adventure

This past weekend was completely insane. Hours of intense concentration alternating with hours of waiting, not enough sleep, fast meals, quick costume changes, and a very ill-timed migraine... yes, I was involved in a 48 Hour Film Project! It's a kind of film-making endurance event, where your team finds out on the Friday evening what genre you'll be doing (drawn at random), and you're given a set line of dialogue, prop, and character to include in your 4-7 minute film. You then have until the Sunday evening to write the script, film it, add music and sound effects, edit it, and get two digital copies to headquarters before the deadline.

Celena had put together a fantastic team of film students, musicians and assorted skilful folk. The music team (the three Lewises and me) had expected to be needed only on the Saturday to put together some background music and whatever else was needed. However, the genre we drew was 'Musical'.
So once we all got over our shock and dismay, the writers started writing and the composers started composing...

The music team set up a 'lair' in a bedroom at our team's base. Laptops and keyboards and instruments were everywhere! I recorded some vocals for one of the musical numbers, plus a drawn-out high-C for a sound effect. Chloe's amazing new microphone was a huge help:

A most excellent microphone
 
Chloe and Willie composing amidst the chaos

I hadn't expected to actually appear on camera, but I did! We were filmed playing our instruments for the film's intro, and we appear in another couple of scenes as well. I was a bit freaked out at first, but got over it pretty quick. :)

Being filmed for the intro (photo by Celena)

I've now seen the finished film, and it's both fun and funny - yay! There are definitely a few things we would have tweaked if we'd had more time, but on the whole it's a damn good effort.

I can't wait to go and see all the films on the big screen in two weeks time. We're pretty confident we have a shot at some of the prizes. Fingers crossed! ;)

Thursday, July 10, 2014

Mending

One benefit of being a crafter is that when something made of yarn or fabric needs mending, chances are you'll know at least one way to tackle it.
For example, because I have basic hand-sewing skills, I'm able to replace buttons, sew a hem, patch jeans, and fix small holes in knitwear. I do all this by trial-and-error, and not terribly tidily! My hand-sewing skills are still a bit rough. ;)

I would, however, like to learn a proper darning technique for when my precious hand-knitted things need repairs. I've been into knitting socks lately, so holes are only a matter of time...

Last year I repaired a second-hand jersey which had a hole in one sleeve cuff, and a couple of ragged bits at the edge of the other cuff and the bottom of the hem. I used laceweight yarn from my leftovers stash, and a small crochet hook to do the repairs. I crocheted around the hole on the cuff with grey yarn, and then filled in the hole (crochet is great for free-styling). I dealt with the 'bites' on the edges by crocheting over them with a contrasting golden yarn. I went right round the cuffs and hem to make it look more deliberate:

Sleeve 1

Sleeve 2

The hem

This afternoon I decided to finally repair my old pair of possum/merino gloves, which had a couple of tiny holes from wear and tear. They're good basic gloves, and I'd stopped wearing them to prevent the damage getting worse, so I'm glad to have them back. :)

Again, I crocheted around the holes first, and then decreased in a spiral. I managed to do a much tidier job this time, partly because the holes were small. I then decorated the repaired-bits with duplicate stitch.

Glove 1, with repair to palm

(and decorated)

Glove 2, with repair at base of thumb.

The decorations were inspired by the 'visible mending' aesthetic of knitter and darning-teacher Tom of Holland. He uses a multitude of patterns and contrasting colours to repair knitwear, which I think is really neat. You can see some of his work on his blog.

Thursday, June 12, 2014

New pattern: Beeswax hat

I have a new hat design out, and I'm extra-super-proud of this one!
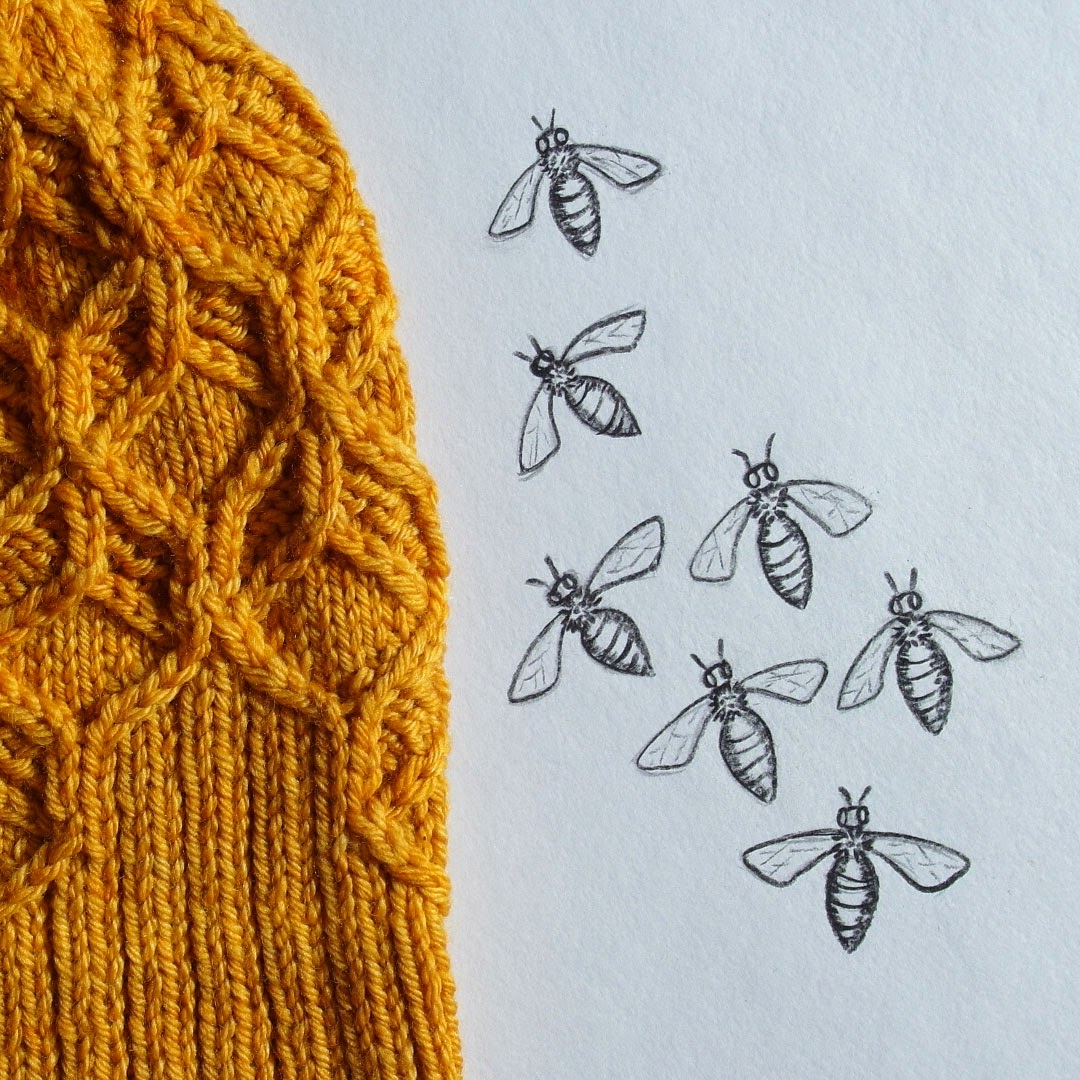
The Beeswax hat is a knitted expression of my honeybee obsession...


I wanted to create a knitted honeycomb texture that showed the back-to-back double layer of natural honeycomb, and I made a few sketches to help me understand its structure. I found inspiration in photos taken by beekeepers, including this gallery by an Australian couple. I also sketched some simple bees, based on my own bee photos (you can find a few on my blog here).


The yarn I chose is from Vintage Purls, one of my very favourite indie yarn-dyers. Vintage Purls 'Max' is a DK-weight merino/nylon sock yarn - it's very soft and bouncy, and comes in wonderful rich colours. I used two-thirds of a skein for this hat, in the colourway 'Easy Rider'.


The Beeswax hat features:
  • a double-layered honeycomb texture, which emerges naturally from the ribbing
  • instructions for knitting mini-cables without a cable needle 
  • crown decreases integrated into the honeycomb pattern
  • one (very stretchy) size, with tips for re-sizing
  • both charted and written instructions 
  • requires less than one skein of smooshy DK-weight yarn

While swatching and test-knitting this hat, I learned a new method for doing cables without a cable needle. I greatly prefer it to my old method of holding onto the stitch with my thumb and forefinger, which was pretty awkward with my yarn-in-right hand knitting style.

My new favourite method is called the 'slip and switch' method in the Knitty.com article, 4 ways to mini-cable. I found Lee Meredith's twisted stitches tutorial really helpful too (it has step-by-step photos and a video).
It's a great method because if you've memorised which way the basic k2tog and ssk decreases lean, it's easy to know which cable-twist moves to do.
I found I didn't even need to follow the chart after a while. :)

The pattern download for the Beeswax hat is available on Ravelry.

I have a matching cowl pattern in the works too! Here it is peeking out from under the hat... ;)

Thursday, January 30, 2014

Pick a path

I'm knitting something a bit different at the moment, which is teaching me a lot about the way I knit these days - I've joined in Ysolda's "mystery" knit-along (or KAL), Follow Your Arrow.

The idea of a mystery KAL is that each week, a new "clue" or section of the knitting pattern is released, and the knitters taking part complete that section and share photos. This is the first mystery KAL I've attempted! I got seduced into it by the choose-your-own-adventure aspect: there are 2 options per "clue", and 5 clues in total, so there are 32 possible shawls.
Plus, I'm an Ysolda fangirl, so it was inevitable really. ;)

I'm choosing between the 2 options for each clue by flipping a coin. This is so I don't change my mind a million times, and to preserve the mystery aspect - I don't know quite what's going to emerge from my needles....

Because I don't have any pictures or diagrams of the finished shawl as I'm knitting, I find I really have to pay attention to each set of instructions - I sometimes need to read sentences several times, and compare the charts to the written instructions to be sure of what to do. It shows how much I usually rely on the visual cues when following other patterns. It's kind of like being a beginner again.

This is my shawl with 3 clues completed (and lifelines in place between sections):

Follow Your Arrow by Ysolda, knit in Vintage Purls Sock.

Of course, after looking at everyone else's photos, I really want to knit some of the other options too! My plan is to knit a second shawl, taking the opposite "path" through the options. The two shawls will be knit from the same pattern, but have no elements in common. Pretty cool. :)